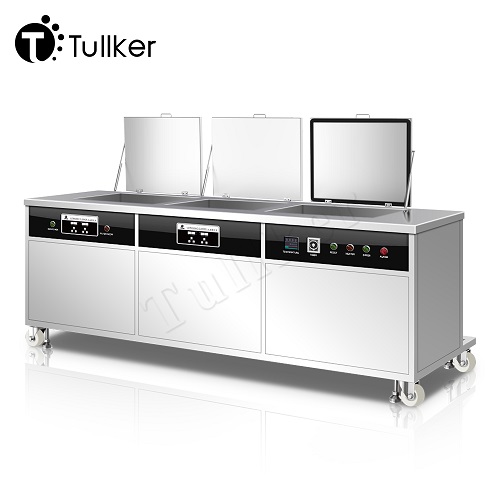
This is a simple training on the operation of the ultrasonic machine.
First, we plug in the power.
When the machine is powered on, this control panel will be on.
Turn on the main power switch, the light is on.
This is the temperature setup for cleaning, Temp+ and Temp-.
After setting, turn on the heating switch, the light will be on, indicating that it is in the "on" state.
This is the setup of the ultrasonic timer, you need to connect the white power supply (generator) in advance.
Ultrasonic timer switch, time+ and time- button.
After setting, this light will be on.
When the time is up, the light will go out.
Circulating filtration, if the cleaning solution is dirty, it needs to be turned on.
It usually needs to be turned on 1-2 times a day. And work for about 5-6 minutes in every cycle.
This is the switch for circulating filtration. When it is on, water will flow out here.
Every time we add water, we need to add it to this position, the position of the overflow port, to form a convection.
This is the sub -tank for circulating filtration. The water flows from the main tank to the sub-tank. And the water in the sub-tank needs to be added up to 80-90%, so that it can form convection.
This is the circulating filter, there is a filter element here.
There is a black wrench that can open it. And we need to change the filter element regularly depending on the dirtiness.
Here is to adjust the speed of the circulating filter flow.
Normally we adjust it at about 30-40%.
Please do not turn it off. If it is off while the pump is working, the pump might be damaged.
The first tank, ultrasonic with cleaning solution for rough cleaning.
The second tank is an ultrasonic rinse and is used according to your requirements.
This is the temperature control button. Please set the desired temperature.
If it is not set, no need to turn it on.
After turning it on, the blue light will be on.
Ultrasonic switch, ultrasonic time setting.
After setting, turn on the ultrasonic switch, the light will be on.
And it will stop when the time is up.
It also needs to be connected to the white power supply (generator).
The third tank is hot air drying, which is a circulating air. And here is the return air outlet.
This is the control panel, the digital display temperature, temperature +, temperature -, set the temperature you like.
Generally, the drying temperature is set at 100-110 ℃.
It will stop automatically when time is up.
This is the timer of the alarm, the time we need for drying.
For example, if it takes 10 minutes, we will adjust it to the "10" position.
If it takes 5 minutes, we will adjust it to the "5" position.
After setting the timer, turn on the reset switch of the alarm, and it starts to count.
When the set time is up, the alarm will buzz.
For example, we set 5 minutes and turned on the alarm reset switch.
After 5 minutes, the alarm will remind you that the drying time is up.
For the heating switch and fan switch, turn on the fan switch first.
After the fan switch light is on, turn on the heating switch.
The fan and heating functions work simultaneously.
When shutting down, turn off the heating switch first to prevent the heating tube from drying out. Then turn off the fan switch.
This is a three-tank ultrasonic cleaner.
There are three pneumatic lids that can be opened and closed.
When cleaning is completed, you need to turn off all the switches before you get off work. Be sure to turn off the main power switch.
The wires of the power supply are per the national standard. The red wire represents the live wire.
380V power cord, three live wires, the black wire is the neutral wire, and the yellow wire is the earth wire.
380V five-wire system, connected to the air breaker switch.
When the machine leaks electricity, it will trip.
Here is the operation of the machine, an electrical cabinet that can be pressed periodically every month to check its function.
Here is the main power switch of the machine.
These are some contactors, such as heating, ultrasonic and other functions.
These are the drain valves corresponding to each tank.
When the cleaning solution is dirty and needs to be replaced with new one, we need to open the drain valve to drain the dirty cleaning fluid.
We can also connect some plastic pipes to lead it out to form a main pipe, to drain the dirty liquid solution to the required place.
This is a fan that circulates hot air for drying and blowing.
Maintain the filter weekly and replace the filter element regularly depending on the degree of dirtiness.


